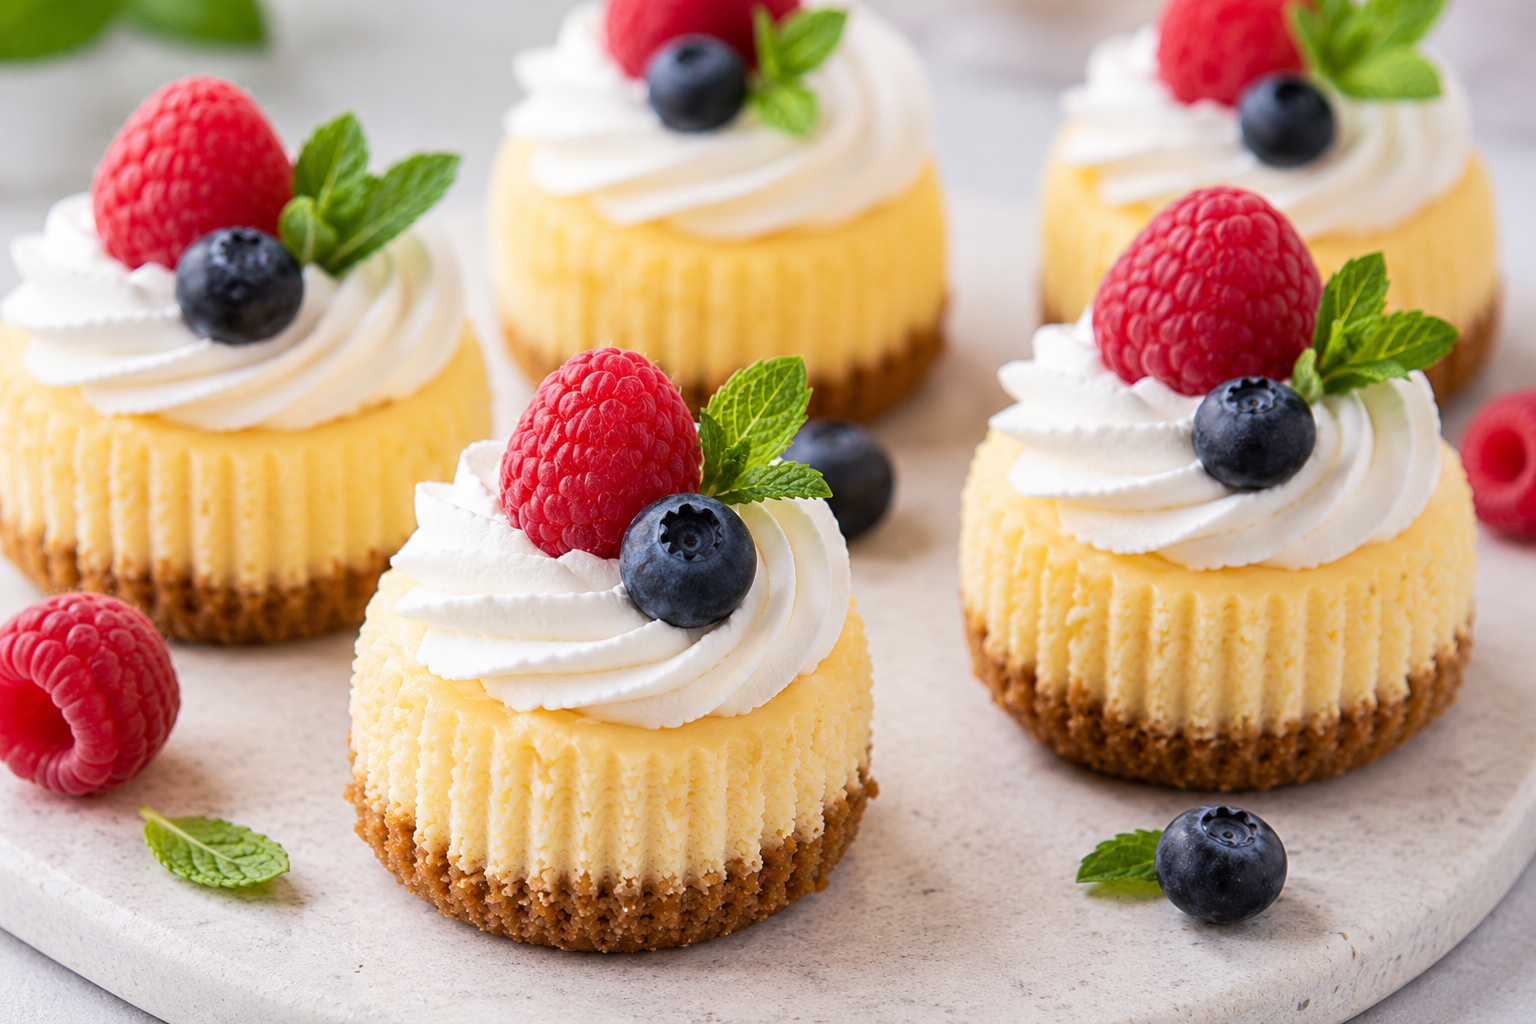
Mini cheesecakes are one of those desserts that look bakery-fancy but feel wonderfully doable at home. They bring all the creamy richness of a classic cheesecake, but in a smaller, easier, party-ready format that bakes faster and chills faster too.
What makes this recipe especially appealing is how low-stress it is. These little cheesecake cups skip the fuss of a water bath, bake in a standard muffin pan, and still aim for smooth, creamy centers with a simple graham cracker crust underneath.
The ingredient list stays pleasantly simple. The crust uses graham cracker crumbs and melted butter, while the filling relies on full-fat cream cheese, granulated sugar, vanilla, and eggs for that classic cheesecake flavor and texture.

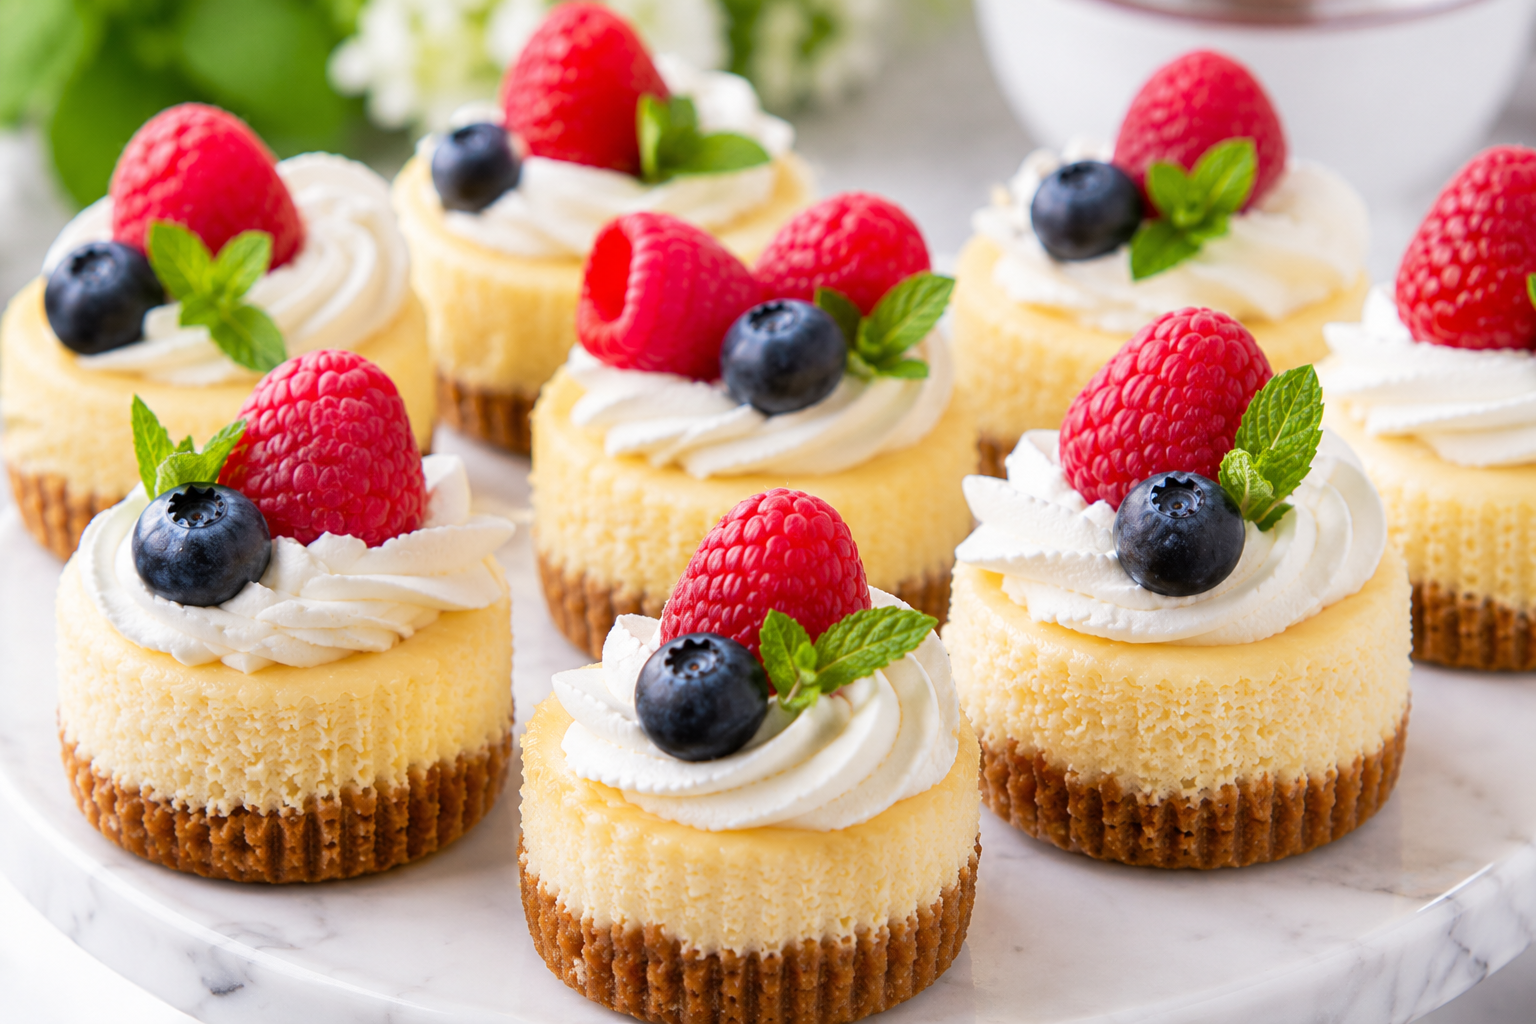
These are also incredibly flexible for holidays, birthdays, showers, and casual gatherings. The original recipe highlights them as a blank canvas for toppings, with options like whipped cream, fresh fruit, chocolate ganache, caramel, pie filling, crushed cookies, or even chopped candy bars.
Texture is a big part of why they work so well. The crust is buttery and firm, while the cheesecake layer stays soft and creamy when baked just until slightly jiggly in the center, then chilled long enough to fully set.
Another reason to save this recipe is the make-ahead factor. These mini cheesecakes keep well in the fridge for up to a week and can also be frozen for up to 3 months, which makes them a smart dessert for planning ahead.
And honestly, individual desserts just make life easier. No slicing, no messy serving, no guessing whether the center is neat enough. Just top, plate, and watch them disappear. That last part is my own practical observation, but the recipe’s muffin-pan format clearly supports easy serving.
Quick Intro Summary
Mini baked cheesecake dessert · Parties, holidays, or make-ahead treats · Creamy, crack-free, and easy to customize.
Recipe Overview
- Prep Time: 20 minutes
- Cook Time: 22 minutes
- Total Time: 42 minutes
- Servings: 12
- Calories: Not clearly listed in the accessible recipe card
- Course: Dessert
- Cuisine: American-style cheesecake dessert
The timings and yield come directly from the recipe card. “Dessert” and “American-style cheesecake dessert” are reasonable classifications based on the recipe format and presentation.
Why You’ll Love This Recipe
- They bake faster and chill faster than a full-sized cheesecake.
- You do not need a water bath or special cheesecake equipment.
- They are easy to make ahead and freeze for later.
- The topping options are almost endless, from berries to ganache to caramel.
- They are naturally party-friendly because each cheesecake is already portioned. This is an inference based on the muffin-pan format and serving size.
Ingredients
For the graham cracker crust
- 1 cup graham cracker crumbs
- 4 tablespoons unsalted butter, melted
For the cheesecake filling
- 16 ounces full-fat cream cheese, softened to room temperature
- 1/2 cup granulated sugar
- 1 teaspoon vanilla extract
- 2 large eggs
For topping
- Whipped cream
- Fresh fruit
The source also suggests other topping ideas like chocolate ganache, caramel, pie filling, mini chocolate chips, chopped candy bars, crushed Oreos, and flavored whipped cream.
How to Make It
- Prep the pan and oven.
Heat the oven to 350°F and line a standard muffin pan with paper liners. - Make the crust.
Stir together the graham cracker crumbs and melted butter until the mixture looks like damp sand. Add about 1 to 2 tablespoons to each muffin cup and press it firmly into an even layer. Bake the crusts for 5 minutes, then let them cool. - Mix the filling.
Beat the softened cream cheese and sugar until smooth, then mix in the vanilla. Add the eggs last and mix just until combined. The recipe emphasizes not overbeating once the eggs go in. - Fill the muffin cups.
Divide the batter evenly among the liners, filling them full over the pre-baked crusts. - Bake until just set.
Bake for 15 to 17 minutes, until the centers are only slightly jiggly. - Cool and chill.
Let the cheesecakes cool to room temperature, then refrigerate them for at least 4 hours before serving. If chilling overnight, loosely cover them. - Top before serving.
Finish with whipped cream, fresh fruit, chocolate ganache, or any topping you like.
Recipe Notes and Tips
Use brick-style full-fat cream cheese, not whipped or tub-style cream cheese. The recipe specifically calls for full-fat cream cheese bars and room-temperature ingredients for a smoother filling.
Do not overmix after adding the eggs. The source warns that overbeating the eggs adds excess air, which can lead to bubbles, cracking, and sinking centers.
Do not overbake either. The centers should still jiggle slightly when the pan is gently moved. If they slosh like liquid, they need more time, but fully firm centers usually mean they have gone too far.
For better structure, let them cool gradually. The recipe notes that sudden temperature changes can cause sinking, and suggests turning off the oven, cracking the door, and letting them rest 15 to 20 minutes before moving them out to cool.
If the tops crack a little, it is not a disaster. The recipe itself points out that toppings cover a lot, so a swirl of whipped cream and fruit easily solves the problem.
Easy Variations
- Swap the graham crust for Oreos or chocolate wafers for a chocolate version.
- Use vanilla wafers or gingersnaps for a different crust flavor.
- Skip the crust entirely for a fork-only version. The source says this is possible, though they are less easy to eat by hand.
- Top with fresh berries in spring, peaches or nectarines in summer, or pomegranate arils in fall.
- Dress them up with chocolate ganache, salted caramel, pie filling, or flavored whipped cream.
What to Serve With It
These mini cheesecakes do not need much beside them, but they work beautifully on a dessert tray with fresh fruit, coffee, tea, or other small bite-size sweets. The source especially supports serving them with whipped cream, fruit, ganache, caramel, and other toppings depending on the occasion.
Storage and Reheating
Store the cheesecakes in an airtight container in the refrigerator for up to 1 week. For the best party freshness, the recipe suggests making them no more than 3 to 4 days ahead.
You can also freeze them for up to 3 months. Wrap individually or store in a freezer-safe container with parchment between layers so they do not stick. Thaw them in the refrigerator before serving.
These are served chilled, so reheating is not needed. That is an inference based on the source’s chilling and serving instructions.
FAQs
Why did my mini cheesecakes sink in the middle?
The source says overmixing, especially after adding the eggs, can trap too much air. That air rises in the oven and collapses as the cheesecakes cool. Sudden temperature changes can also cause sinking.
How do I keep mini cheesecakes from cracking?
Mix gently once the eggs go in, do not overbake, and cool them gradually rather than moving them straight from a hot oven to a cool kitchen.
Can I make them ahead of time?
Yes. They are specifically described as a make-ahead dessert and store well in the fridge or freezer.
Can I freeze mini cheesecakes?
Yes. Freeze them for up to 3 months and thaw in the refrigerator before serving.
What toppings work best?
Whipped cream and fresh fruit are the simplest options, but the recipe also suggests ganache, caramel, pie filling, crushed cookies, chopped candy bars, and flavored whipped cream.
Mini Cheesecake Cups with Creamy Centers and Easy Berry Toppings
Ingredients
Method
- Prep the pan and oven.
- Heat the oven to 350°F and line a standard muffin pan with paper liners.
- Make the crust.
- Stir together the graham cracker crumbs and melted butter until the mixture looks like damp sand. Add about 1 to 2 tablespoons to each muffin cup and press it firmly into an even layer. Bake the crusts for 5 minutes, then let them cool.
- Mix the filling.
- Beat the softened cream cheese and sugar until smooth, then mix in the vanilla. Add the eggs last and mix just until combined. The recipe emphasizes not overbeating once the eggs go in.
- Fill the muffin cups.
- Divide the batter evenly among the liners, filling them full over the pre-baked crusts.
- Bake until just set.
- Bake for 15 to 17 minutes, until the centers are only slightly jiggly.
- Cool and chill.
- Let the cheesecakes cool to room temperature, then refrigerate them for at least 4 hours before serving. If chilling overnight, loosely cover them.
- Top before serving.
- Finish with whipped cream, fresh fruit, chocolate ganache, or any topping you like.